About This Recipe
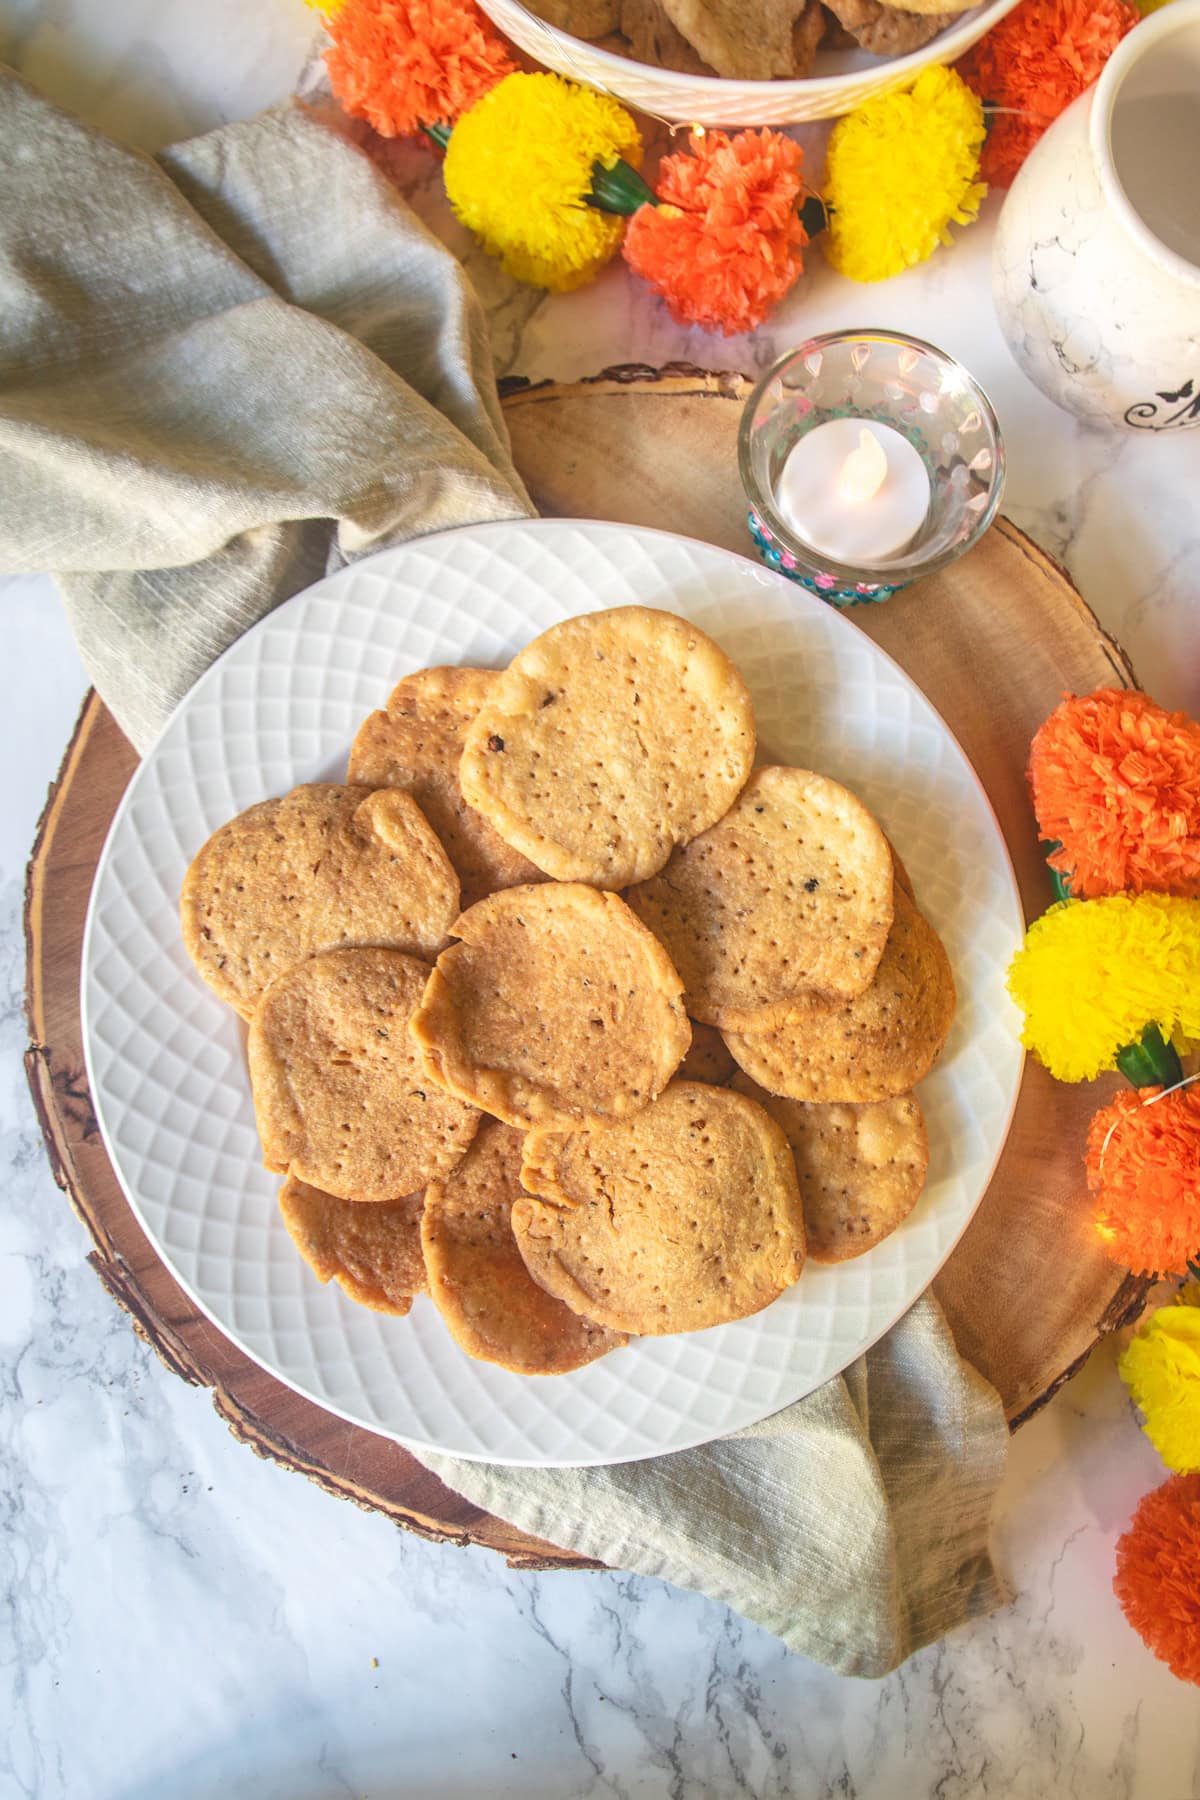
In Gujarati, “Farsi” means flaky (khasta), which describes the texture of this puri. The flakiness comes from the ghee added to the dough. While it’s similar in taste to Punjabi mathri, the texture is different, with Farsi Puri having a more flaky texture. Farsi Puri is a must in every Gujarati household during Diwali and is always on top of the list of Diwali snacks. Though these farsi puris are high in calories due to the ghee and deep frying, it’s okay to indulge during festive times like Diwali. After all, we make these only once a year! I’d say two puris per person with a cup of tea is the perfect snack—if you can resist eating more!
Ingredient Notes
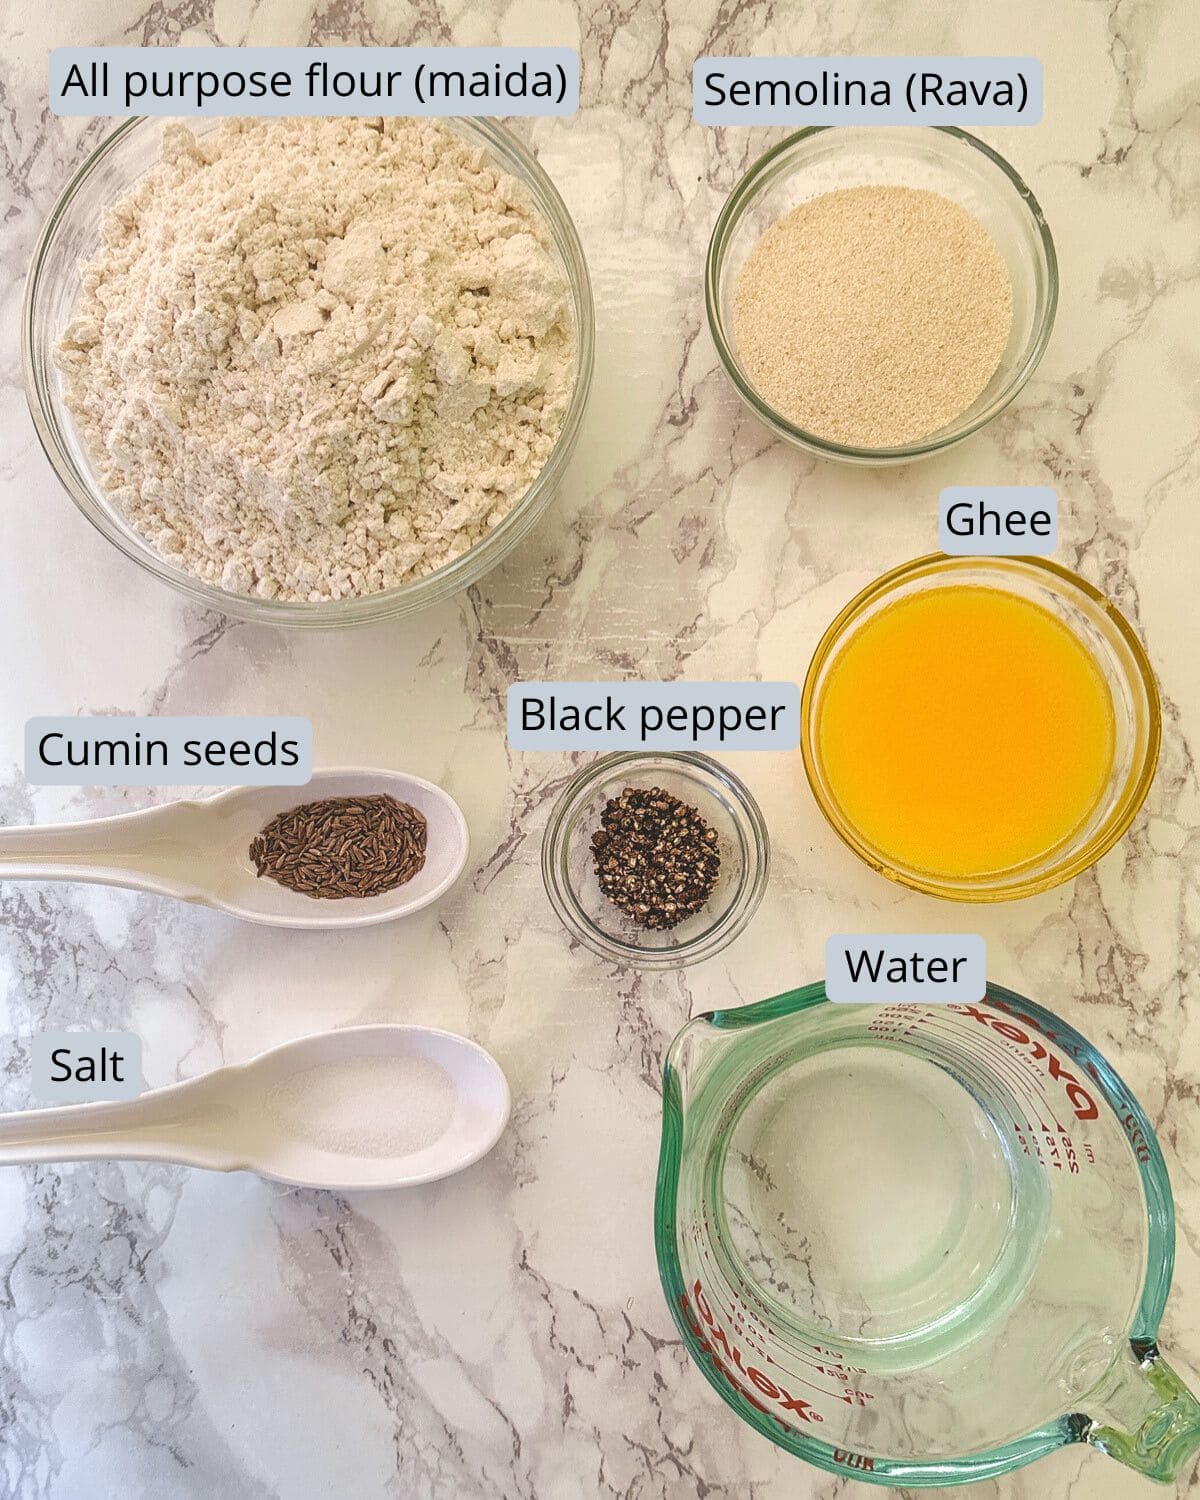
Here is a pic of the ingredients you’ll need to make this farsi puri recipe. Note: Oil is used for deep frying but is not shown in the picture.
Step By Step Photo Instructions (With Tips)
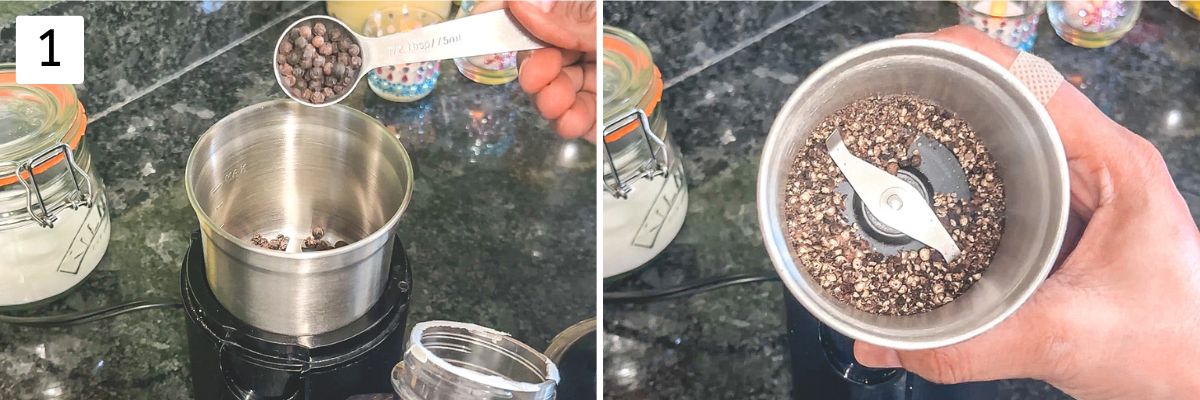
Step 1: Crush Black Peppercorns
Crush your peppercorns coarsely—avoid making them into a fine powder, as the coarser texture adds a better bite. I used a spice grinder for this, but you can also use a mortar and pestle.
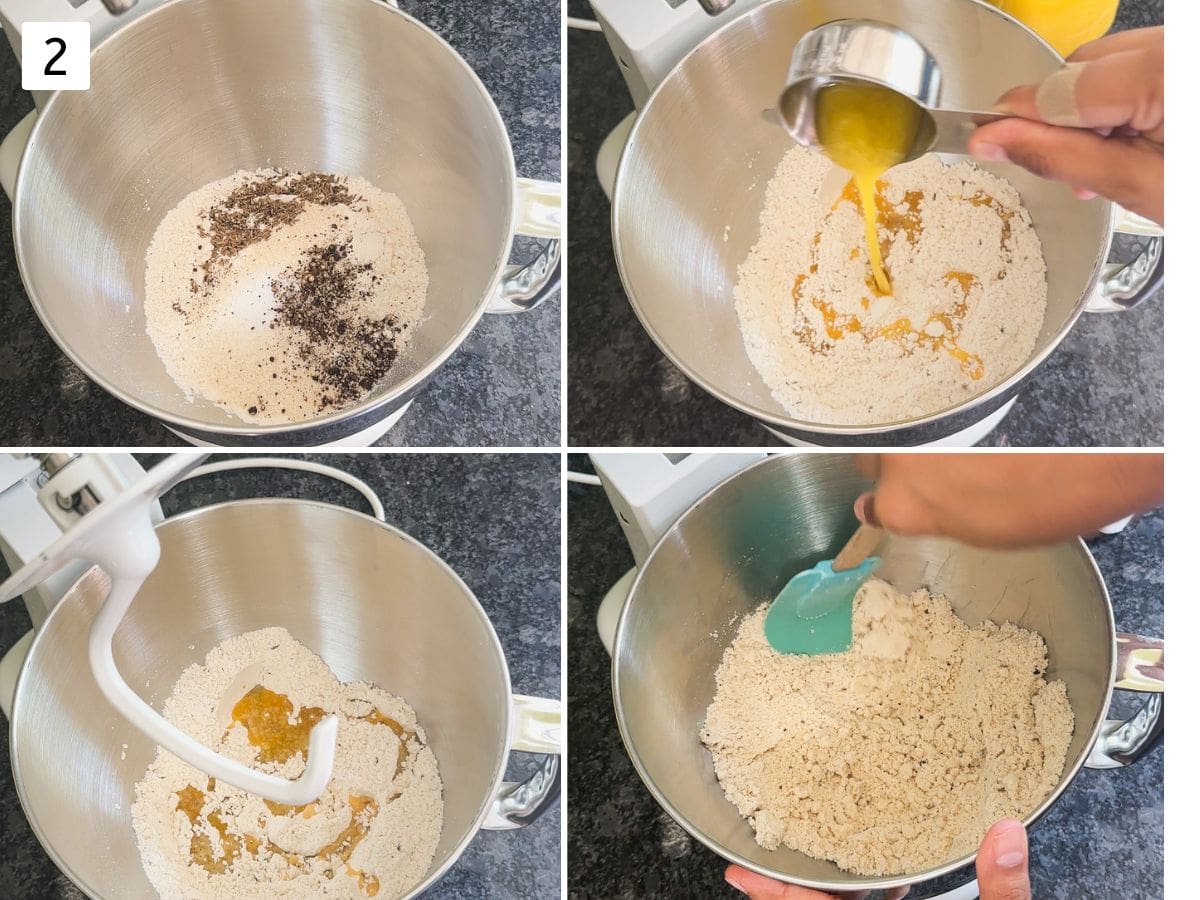
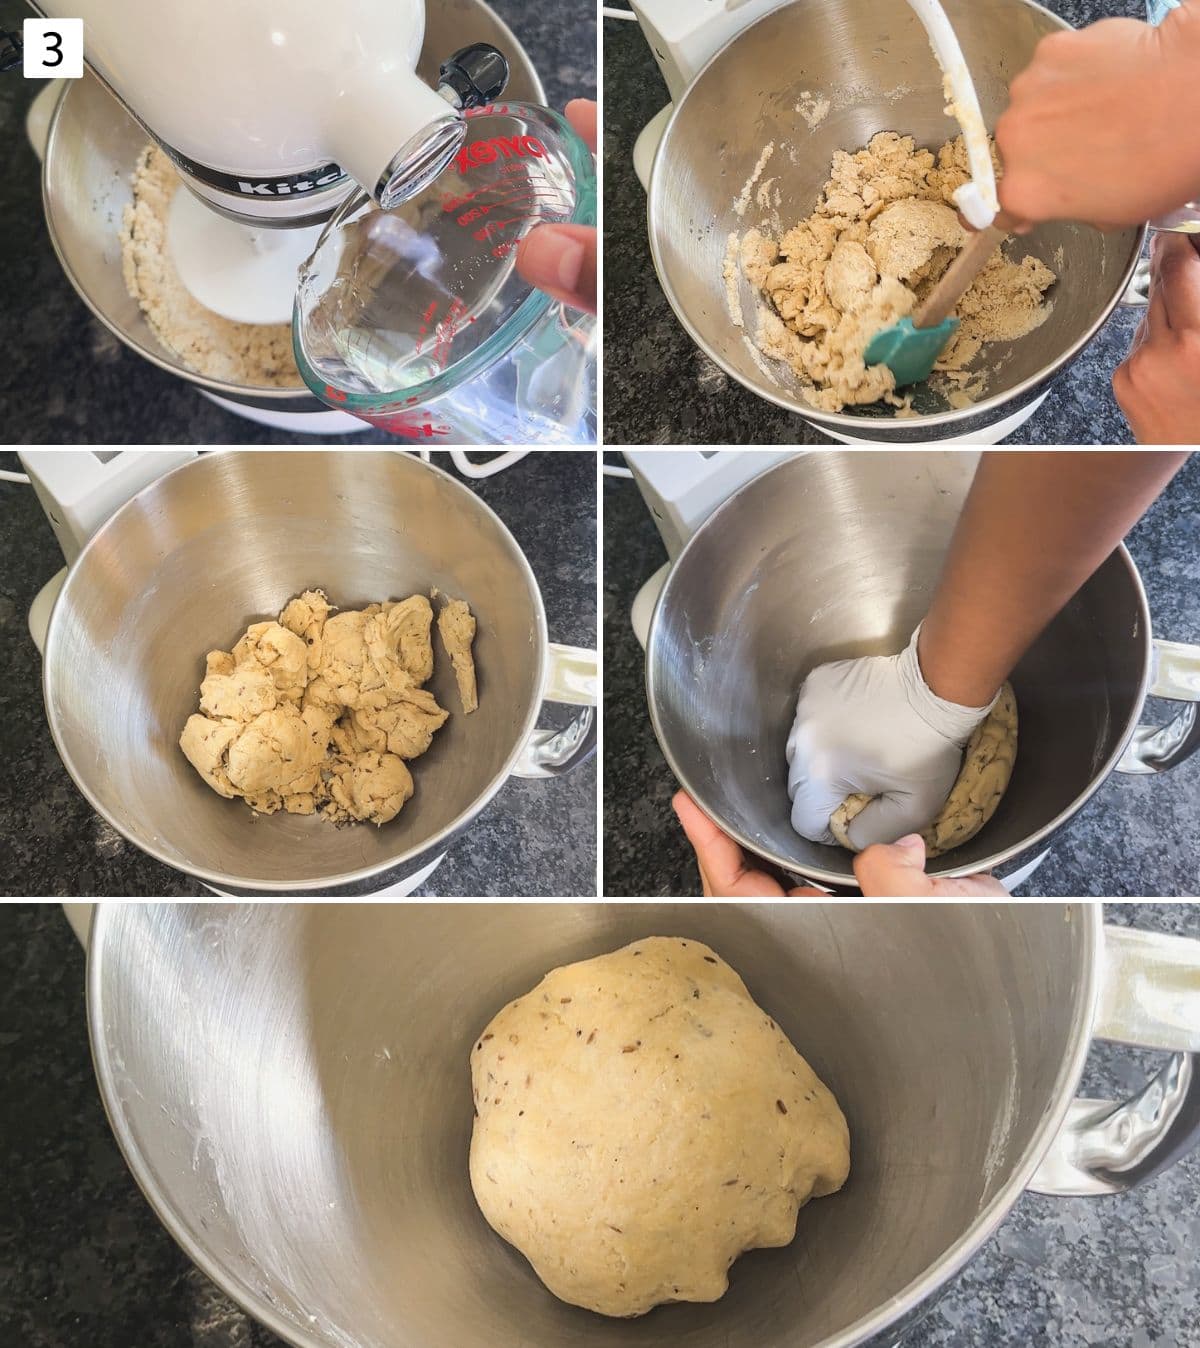
Step 2: Mix Flour & Oil (Moyan)
In the bowl of a KitchenAid stand mixer, combine flour, semolina (sooji), salt, crushed black pepper, and cumin seeds. Stir the mixture gently with a spatula or spoon. Pour in the ghee. Make sure the ghee is in runny form (melted or semi-melted). Then attach the dough hook. Set the mixer to a low speed. Let it run for approximately 3 minutes, allowing the oil to blend evenly with the flour. If you spot any larger clumps of the oil-flour mixture, use a spatula to break them up for an even texture.
Step 3: Kneading the Dough
With the mixer on LOW, slowly add water around the edges of the bowl. The mixture will gradually come together and begin forming a dough. Once all the water has been added, pause the mixer and scrape down the sides and bottom of the bowl. Turn the mixer back on to low-medium speed until it forms a kind of dough (into 2-3 dough balls) Gather the dough by hand, smoothing it into shape. The dough for farsi puri should be semi-stiff—not as soft or pliable as roti or chapati dough. Cover the dough and let it rest for 15-20 minutes.
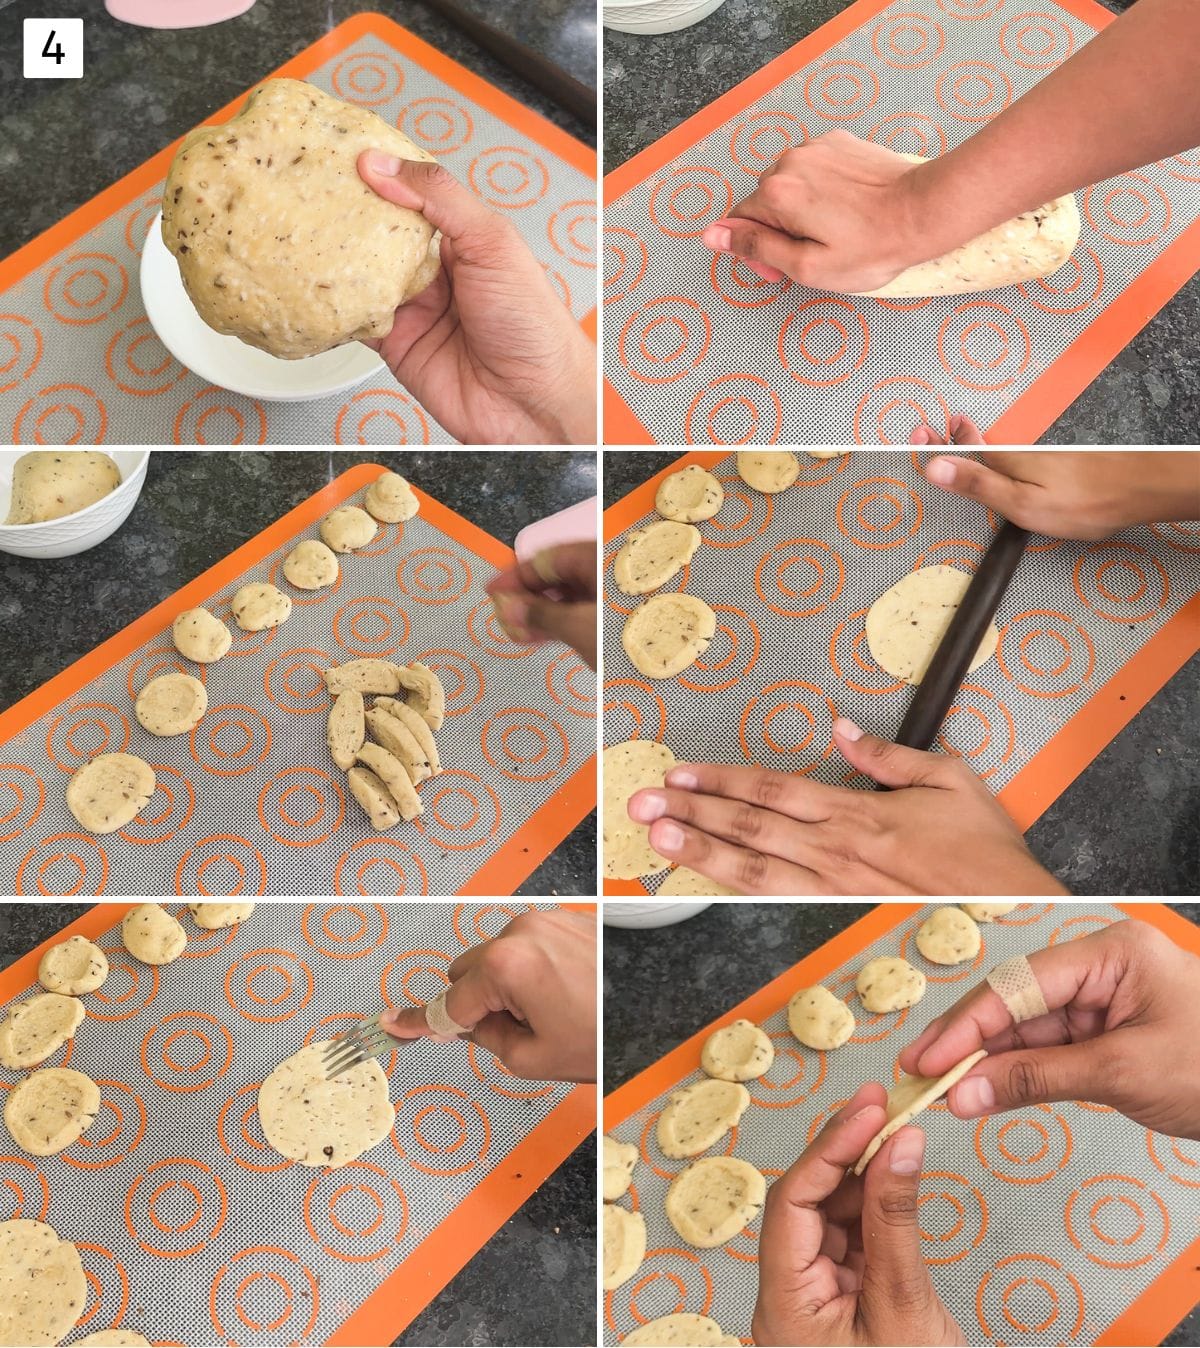
Step 4: Roll The Puris
After resting, you may see tiny white spots on the dough—this is due to the salt. Knead the dough a few times (4-5) to smooth it out. Divide the dough into 2-3 portions and shape each portion into a cylinder. Cut each cylinder into small pieces, about 2 teaspoons in size. Roll each piece into a smooth ball, then flatten it gently between your palms to form a small disc. Roll each disc into a 3-inch circle, about ⅛-inch thick. Prick each puri 4-5 times with a fork to cover the surface and prevent puffing during frying.
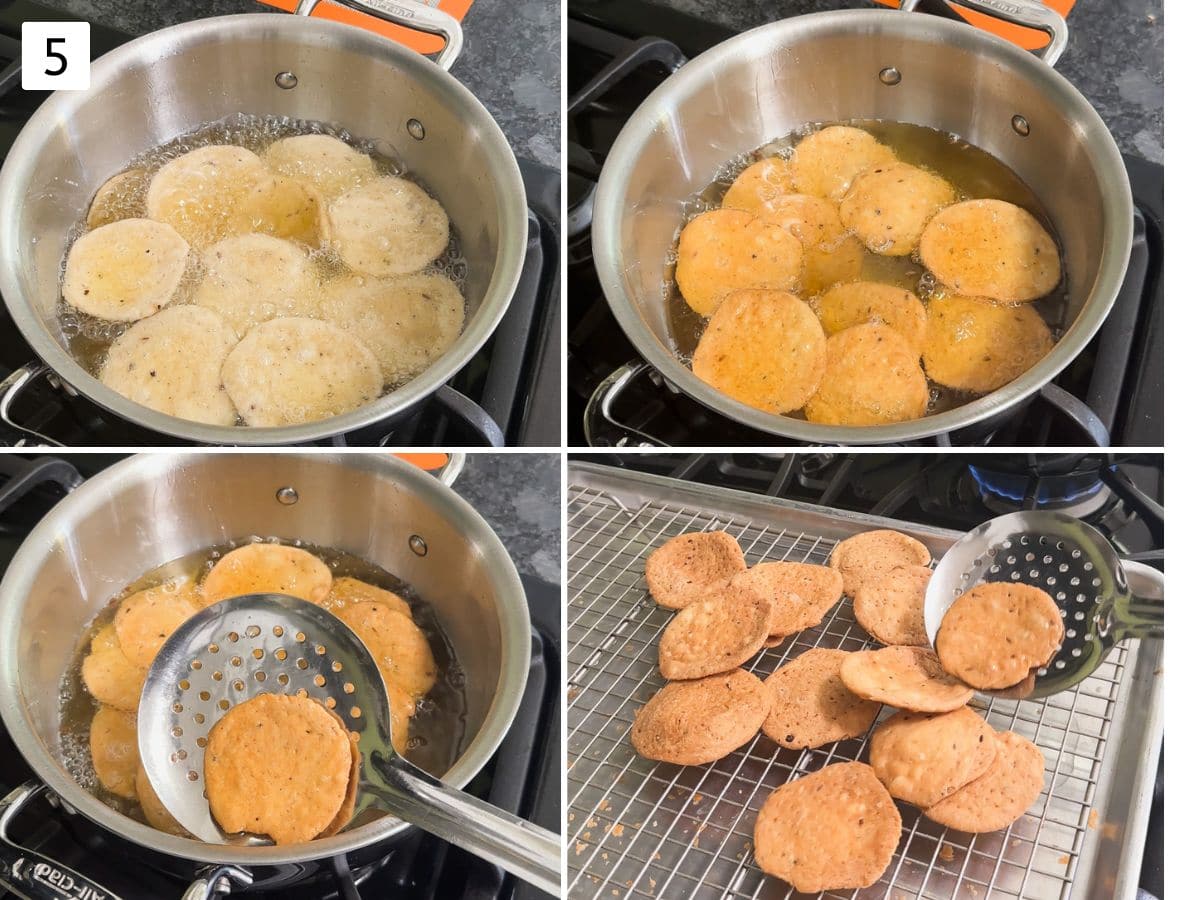
Step 5: Deep Fry Farsi Puri
Heat oil in a kadai over medium heat for deep frying. Once the oil is hot, lower the heat to low. Gently add a few farsi puris at a time without crowding, so they don’t stick together. Fry on low-medium heat until they turn golden brown and crispy. Use a slotted spoon to lift the farsi puris from the oil, allowing any extra oil to drain off. Transfer to a plate. While the first batch is frying, prepare the next batch by rolling and cutting the dough, so it’s ready to go.
Storage Instructions
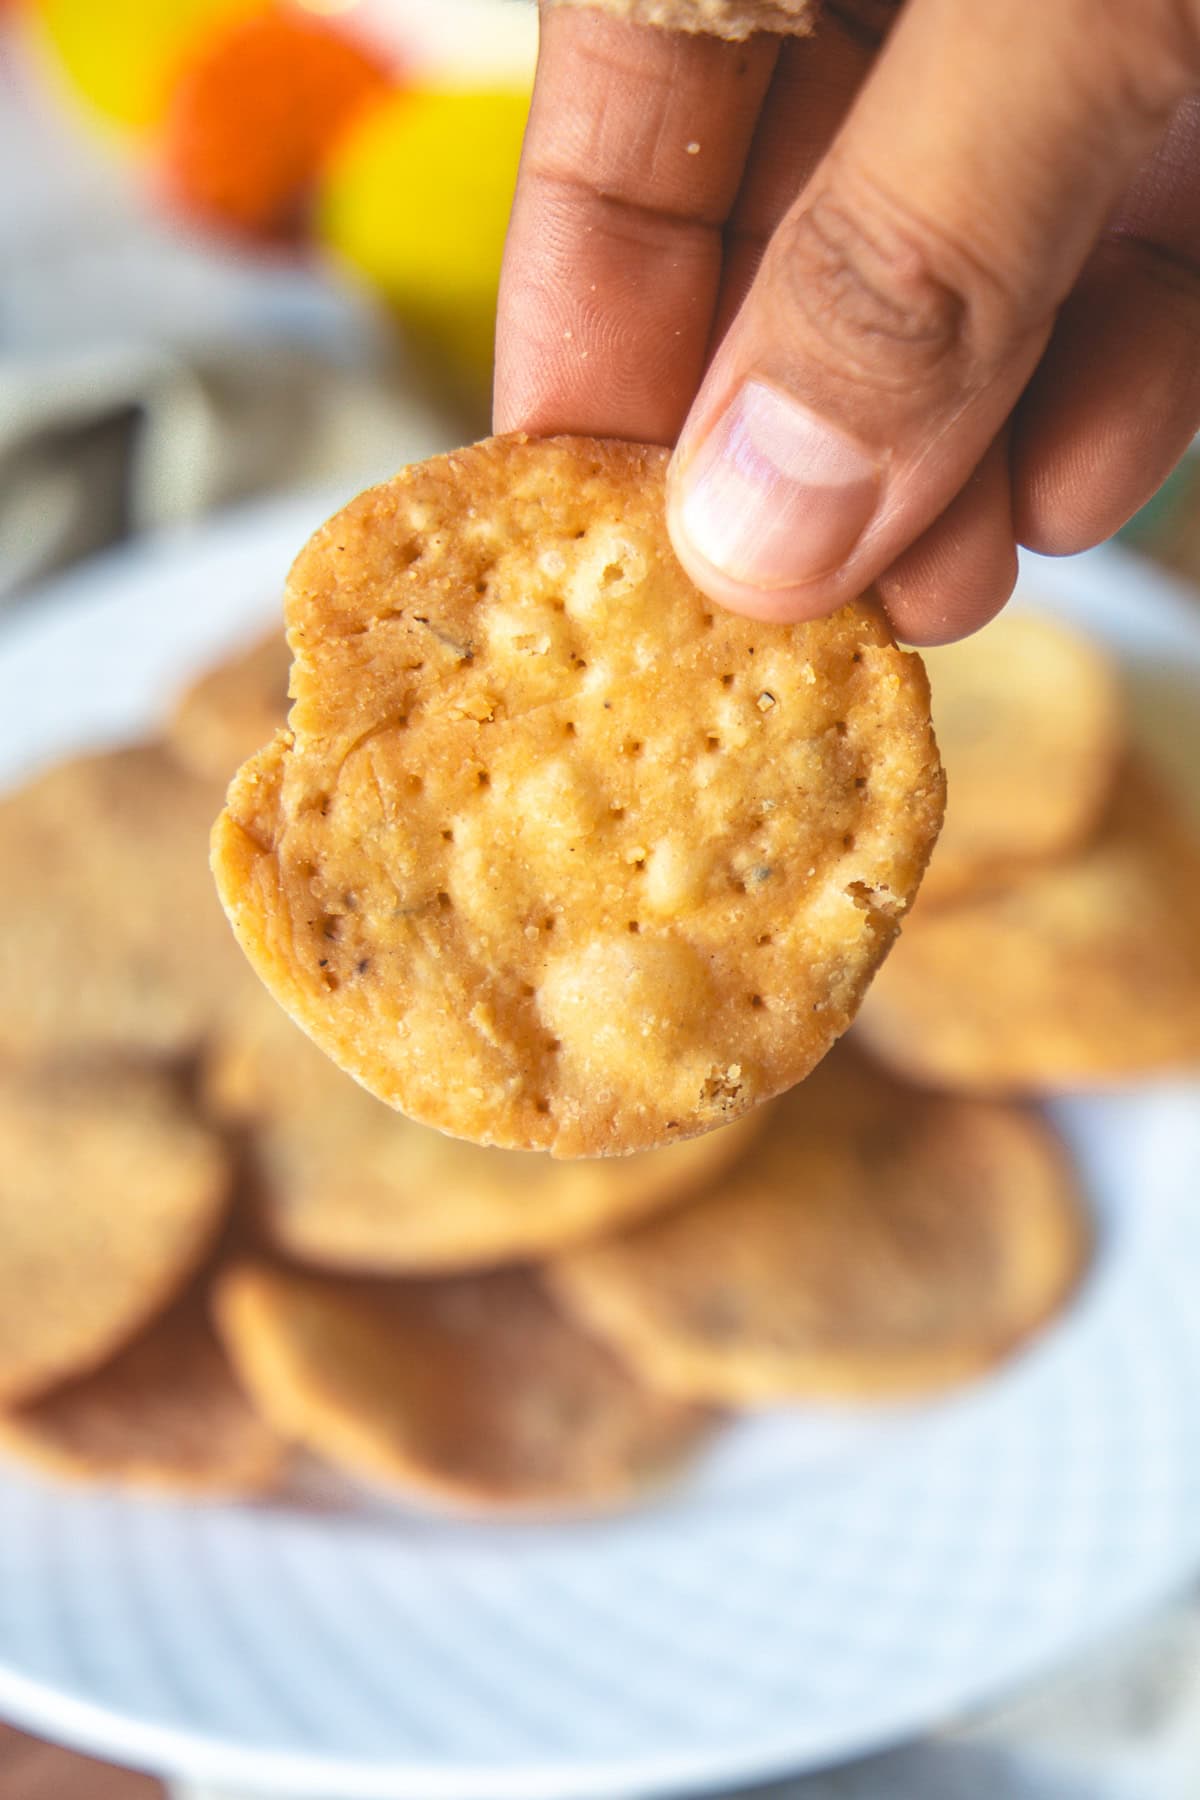
Let the fried farsi puri cool down completely before storing them. Once cooled, transfer them to an airtight container. They can stay fresh for about 3-4 weeks (if you can resist eating them all 😉).
Did you try this recipe? I’d love to hear about it! Leave a review in the comment section below. If you’re sharing it on your Instagram then don’t forget to tag me @spice.up.the.curry
Poha chivda Magas Recipe Tikha Gathiya Kopra Pak Chakli Churma ladoo