Pav bhaji is the most popular mumbai street food among all the dishes. If I am not wrong, It is also loved by everyone. At least my family loves it, so I make it very often. I have not seen any person who doesn’t like pav bhaji yet. Whenever I make pav bhaji, I always make big batch. I store the leftover in the container in the fridge. We enjoy it in next day lunch. The next day, it tastes even better as the flavors will get chance to mingle. In India, I have seen many different varieties of pav bhaji in the restaurant or stall menu. The menu includes jain pav bhaji, khada pav bhaji, corn pav bhaji, cheese pav bhaji, butter pav bhaji, soy pav bhaji, mushroom pav bhaji, paneer pav bhaji. I like to eat all the varieties except corn one. I like corn but not in bhaji. The method of making paneer pav bhaji is almost similar to my pav bhaji recipe. The difference is amount of butter added here. I have used less butter compared to the original recipe, because addition of paneer makes it rich already and so I have cut down the butter. When I had paneer pav bhaji in India, they have added very tiny pieces of paneer in the bhaji. I liked that but still I prefer my pav bhaji smooth. So here I have added grated paneer.
(Step by Step Photos):
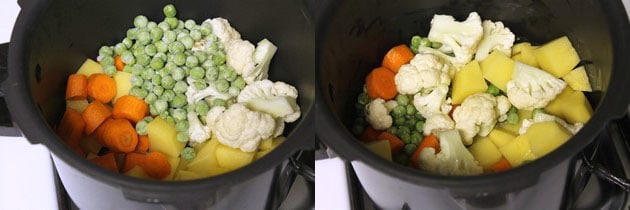
- Take chopped potatoes, carrots, cauliflower and green peas in the pressure cooker.
- Add salt and ¾ cups of water. Mix it. It looks like there is not much water in it. But that is ok, while cooking water leaves its own water and consistency will be fine. if added too much water then it will be too watery.
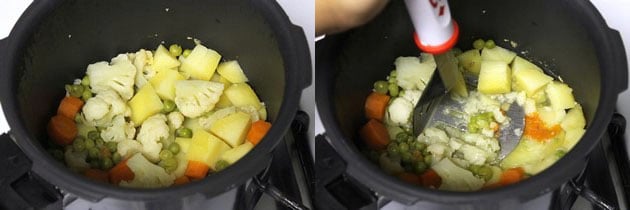
- Cover the cooker with lid, put the weight on. Turn the heat on medium. Let it cook for 3-4 whistles. While it is cooking, chop other ingredients for bhaji. Let the pressure go down by itself. Then open the lid.
- Mash it using potato masher.
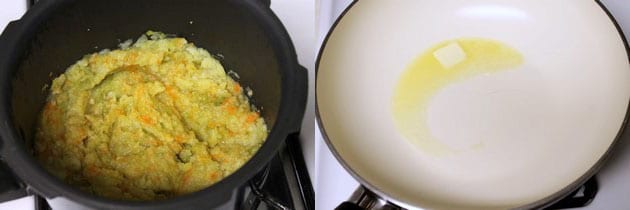
- Don’t make it like a puree, it should be little chunky. Keep it aside.
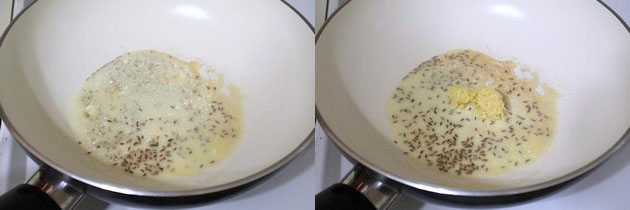
- Heat the butter in pan on medium heat.
- Once hot add cumin seeds. Let them sizzle a bit.
- Then add garlic paste.
- cook for a minute. Or till the raw smell of garlic goes away.
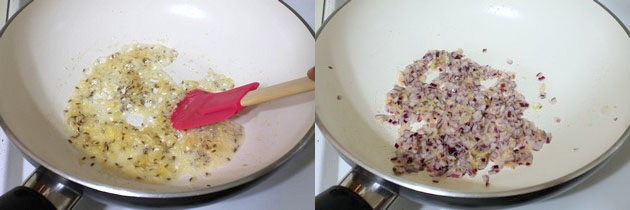
- Then add chopped onions. Sprinkle some salt.
- Cook till onions are light brown in color.
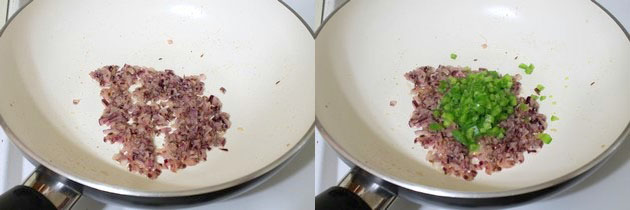
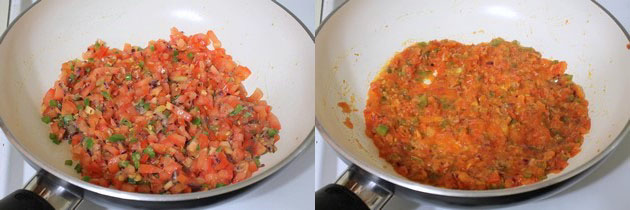
- Add chopped capsicum and mix.
- Cook for 3-4 minutes. Capsicum will get soften.
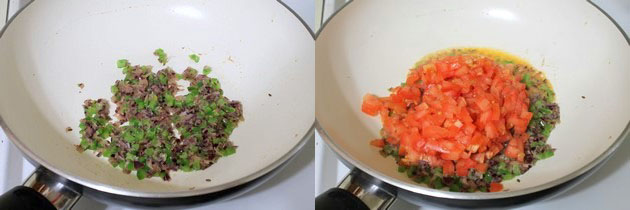
- Add chopped tomatoes.
- Mix well and cook.
- Tomatoes will get soft and juicy. Let all the water gets evaporated. Cook till it becomes chunky yet thick paste.
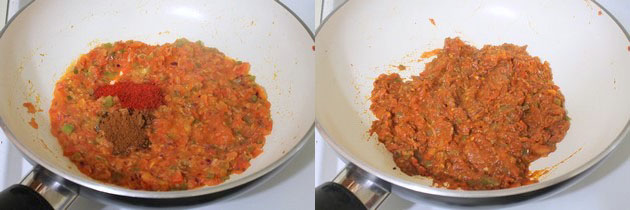
- Add pav bhaji masala and red chili powder.
- Mix well and cook for a minute.
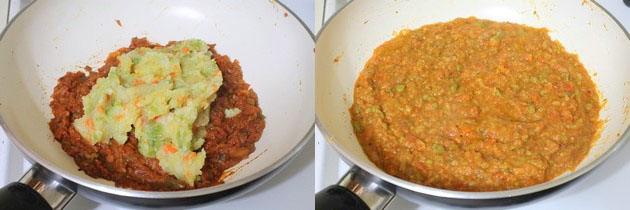
- Then add prepared mashed veggies.
- Mix well. Add water and mix well. Adjust the water quantity as per your liking consistency. Let it simmer for 4-5 minutes.
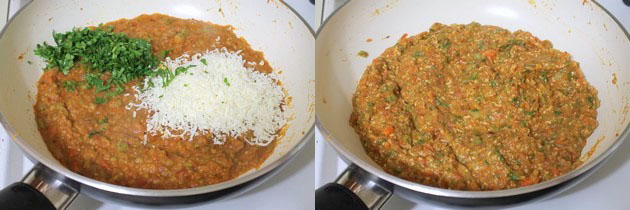
- Now add grated paneer and chopped coriander leaves.
- Stir well and cook for 2-3 minutes.
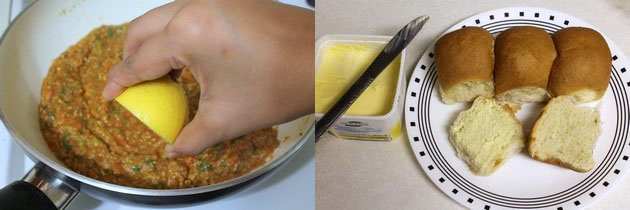
- Turn off the stove. Squeeze the fresh lemon juice. Mix well and keep it covered.
- Now to toast the buns, Cut into half horizontally. Spread the butter on both the sides using butter knife.
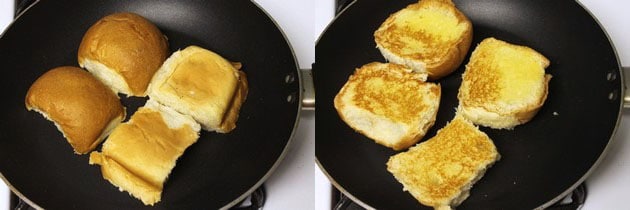
- heat the pan on medium heat. Once hot place the butter side facing down on the pan.
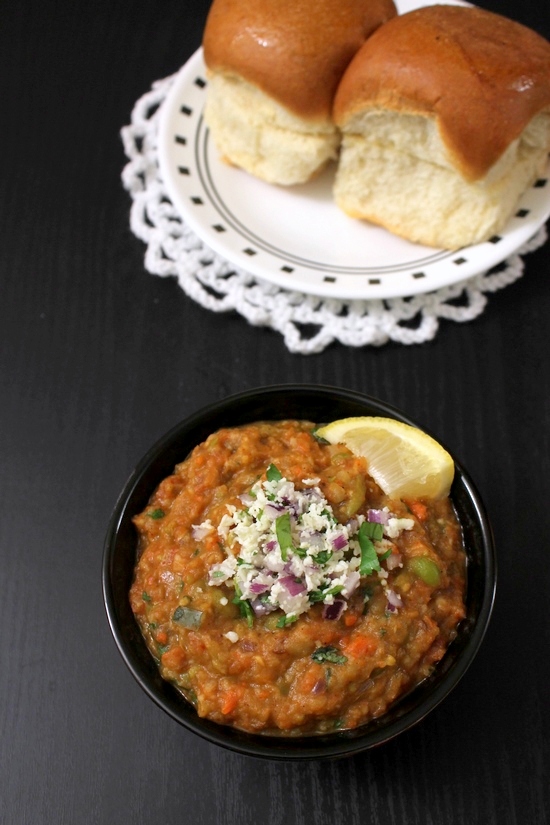
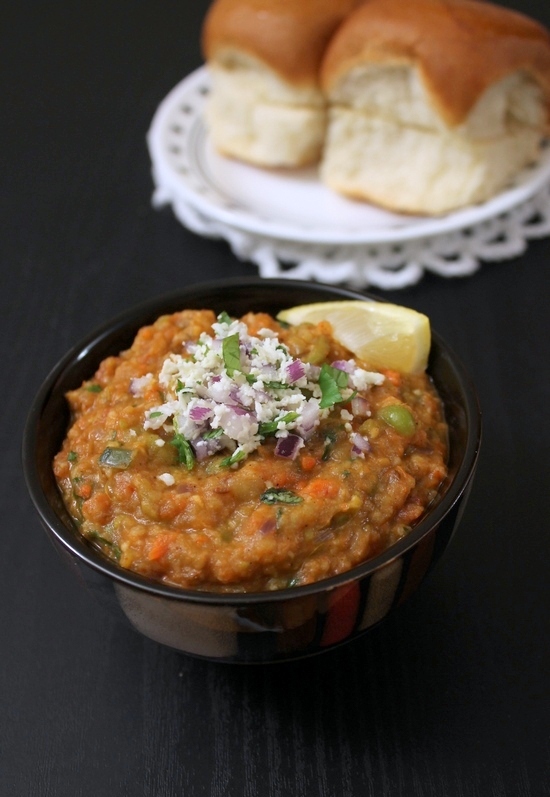
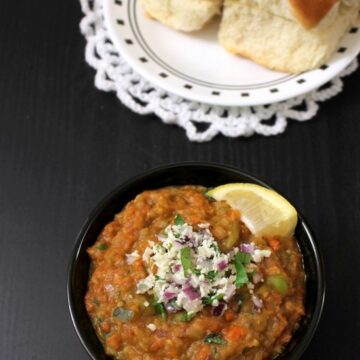
- Once gets golden brown from one side, turn it around the toast other side. Other sides (meaning the top side) should be very lightly toasted. Remove it to a platter. and repeat for rest of the pav. Now served the warm bhaji on the plate, garnish with mixture of chopped onion, little grated paneer, cilantro leaves. On side serve more chopped onions, lemon wedges and pav. Serving suggestion: Serve the pav bhaji as a snack or as a meal.