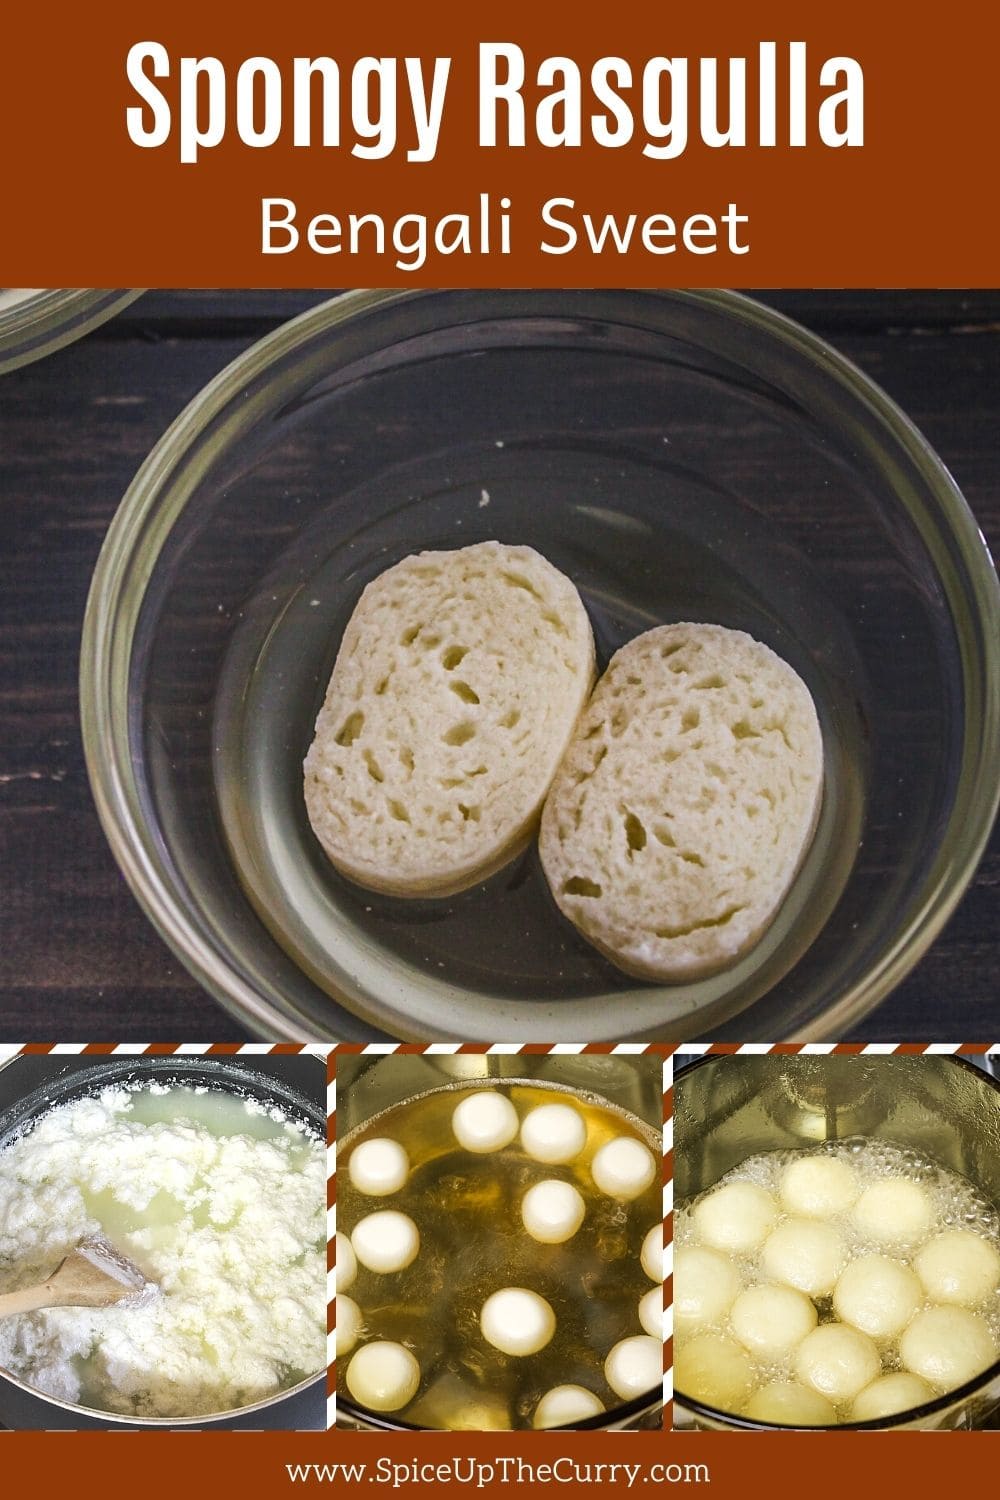
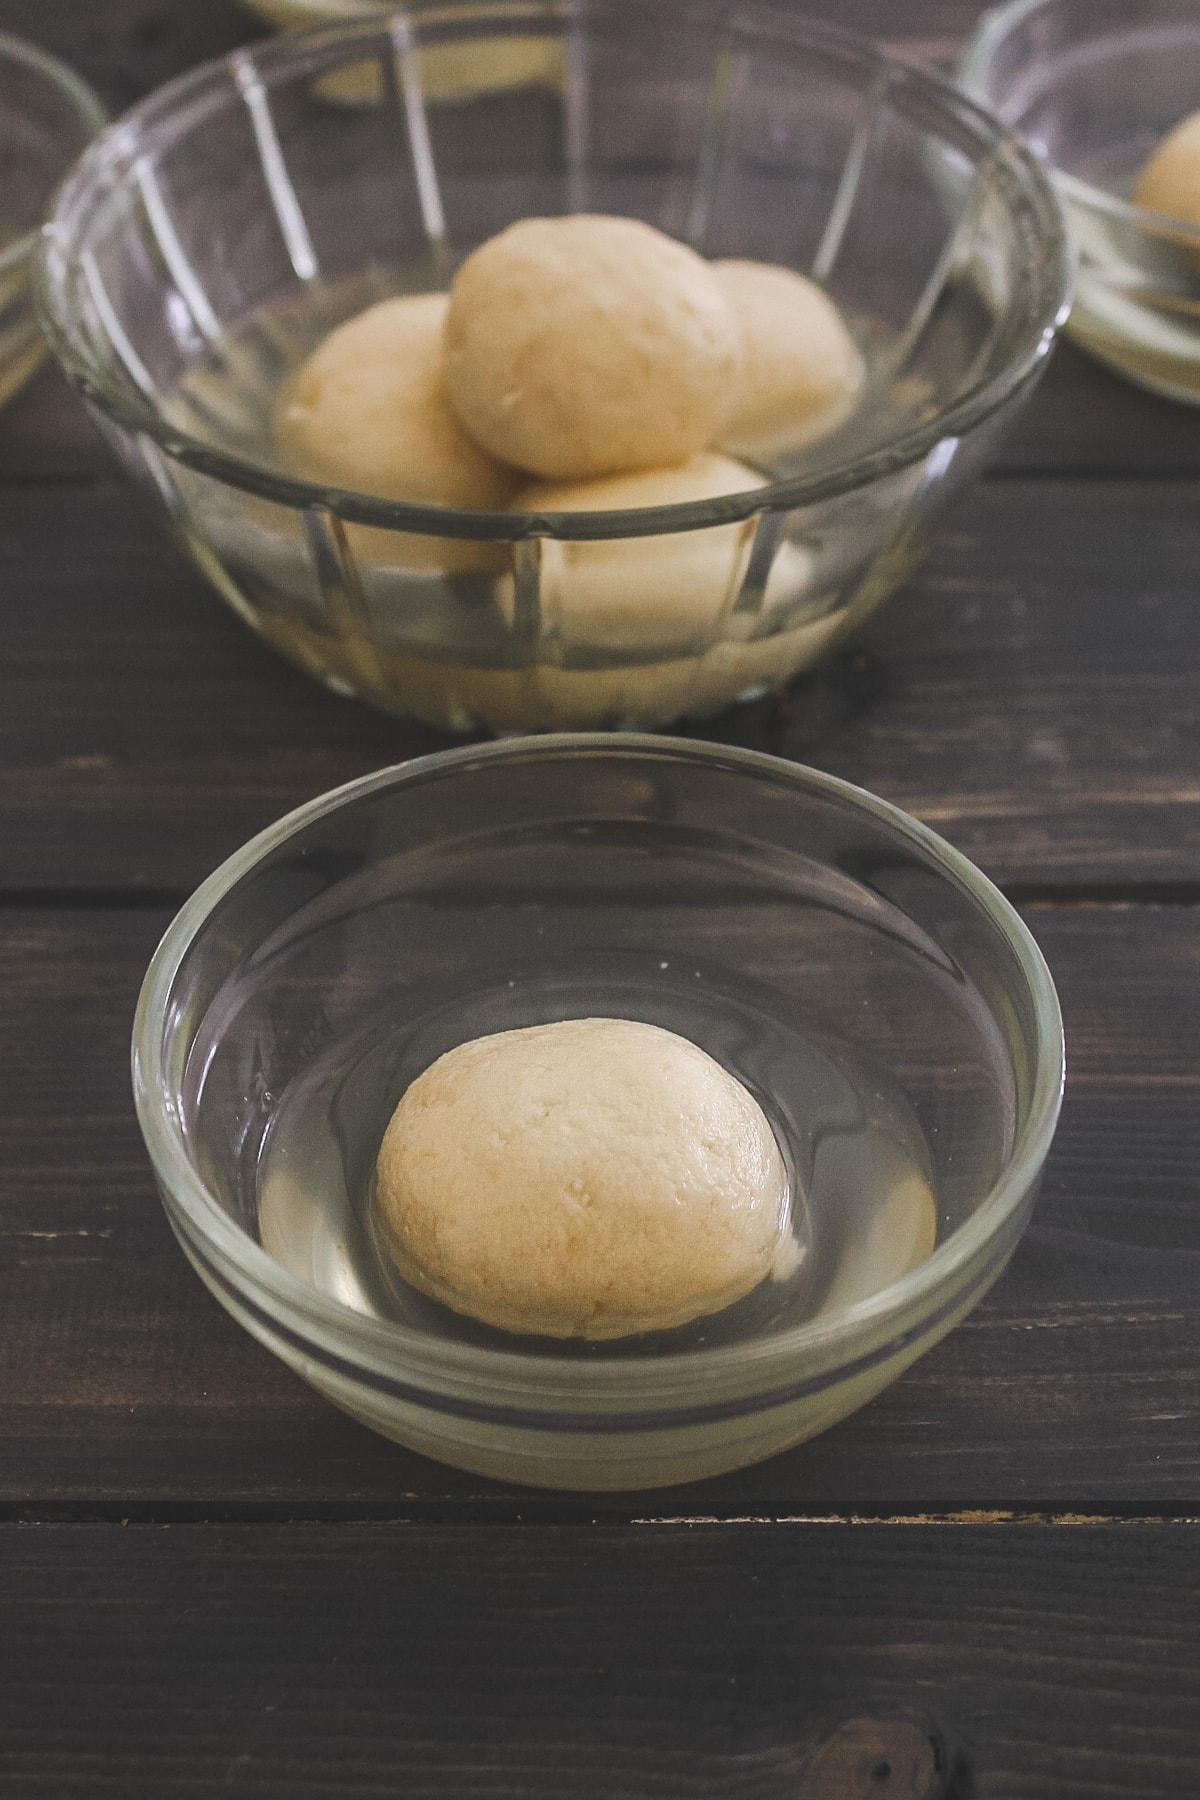
Here you’ll learn all the tips and tricks to make it perfect every single time. So keep reading!
What is Rasgulla?
This is the traditional Bengali sweet made from chenna and sugar. Chenna is made by curdling the milk and then tiny balls are made from it. These chenna balls are cooked into the sugar syrup until juicy, soft and spongy. These juicy balls are super delicious and made during the festive season.
❤️ You’ll Love This Rasgulla Recipe
I have tried making rasgulla at home so many times and failed so many times. After all the trials and errors, I have come up with this fool-proof recipe that never fails me (also you). Yes, these rasgulla have so soft and spongy texture that when you press lightly and release the pressure, it bounces back to its original shape. This rasgulla recipe is a beginner-friendly recipe. Please read the entire recipe carefully before trying to get success. Don’t just scan through the images. Homemade rasgulla tastes much better than store-bought. Try it and you’ll notice. You’ll need only 1 hour to make this rasgulla recipe (from start to finish).
🧾 Ingredients For Rasgulla Recipe
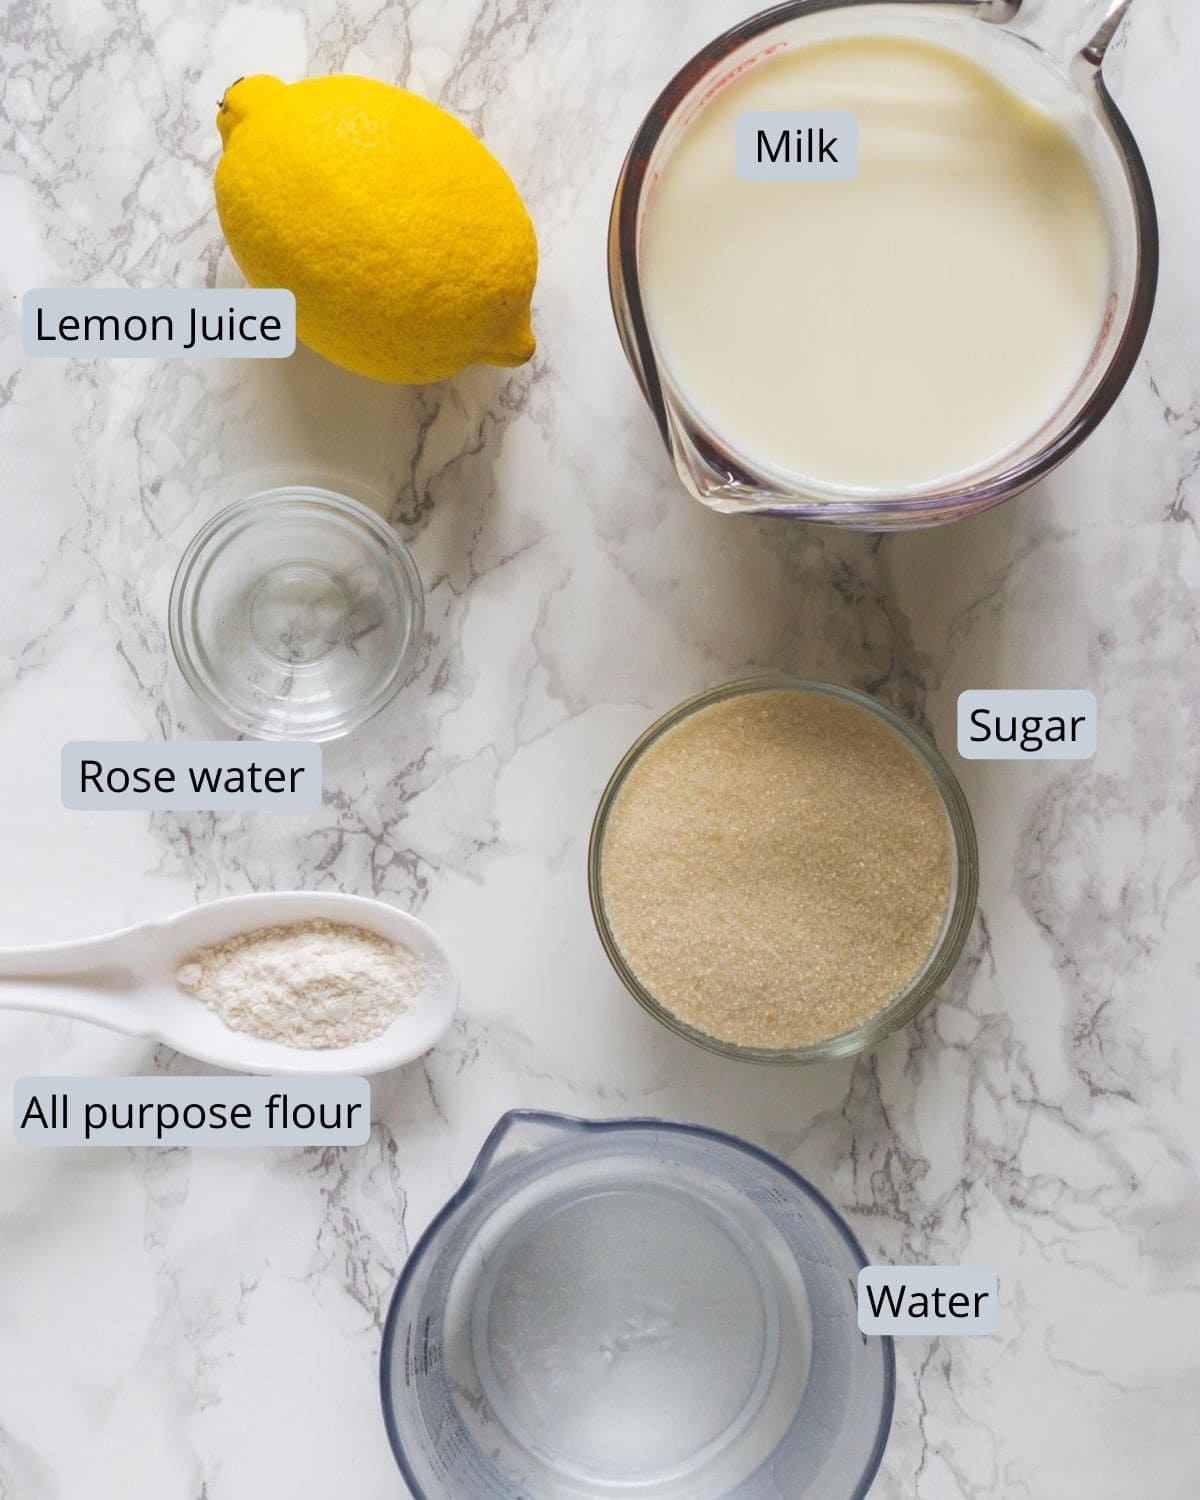
Here is the pic of ingredients required to make perfect rasgulla. Total of 6 ingredients only (milk and sugar being the main ingredients).
Milk: I cannot stress enough to say “Always use full-fat whole milk”. Sugar: I have used organic sugar hence the syrup and rasgulla have light pale color instead of white. Lemon juice: Always use freshly squeezed lemon juice. Do not use bottled juice.
👩🍳 How To Make Rasgulla? (Stepwise)
Making Chenna:
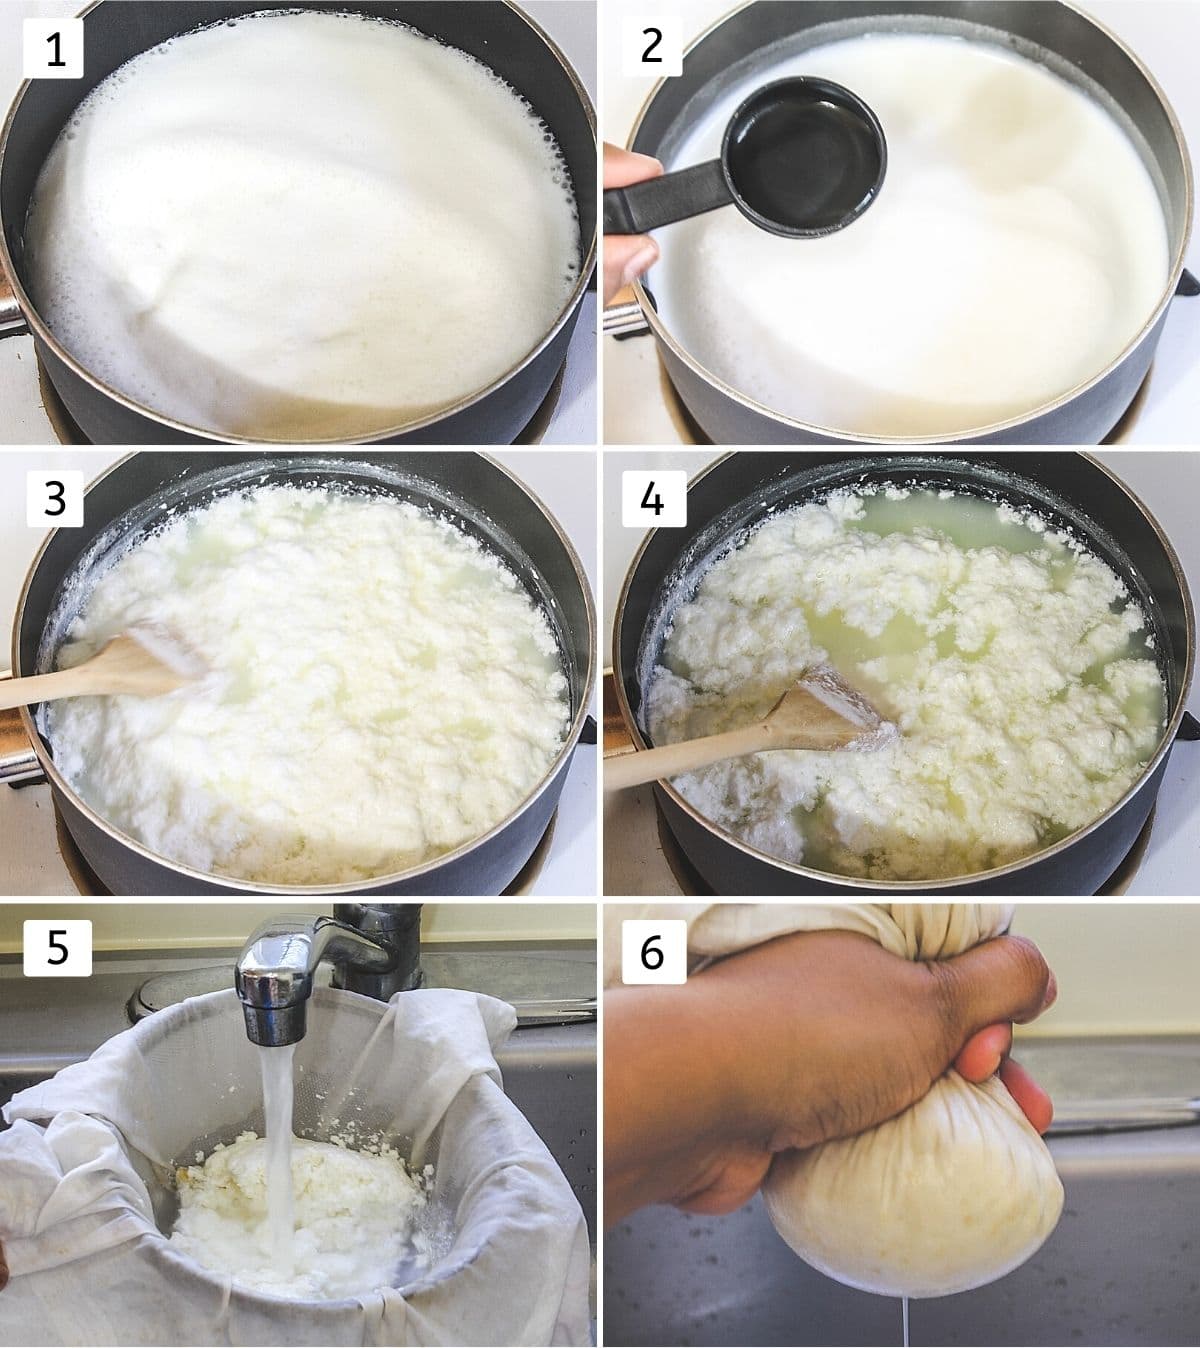
- Prepare a sieve for straining by lining a large fine-mesh sieve with several layers of cheese cheesecloth or use man’s handkerchief or thin cotton cloth. Set over a large bowl.Take milk in a heavy bottom pan and bring it to a boil.
- Turn off the heat and start adding lemon juice and keep stirring.
- As you stir, milk starts to curdle. If it does not curdle completely then add little more lemon juice and stir.
- Now the milk solids and greenish whey are separated. Strain the mixture using a prepared strainer.
- Immediately wash the chenna under running cold water to stop the further cooking process, plus remove the citrus taste from it.
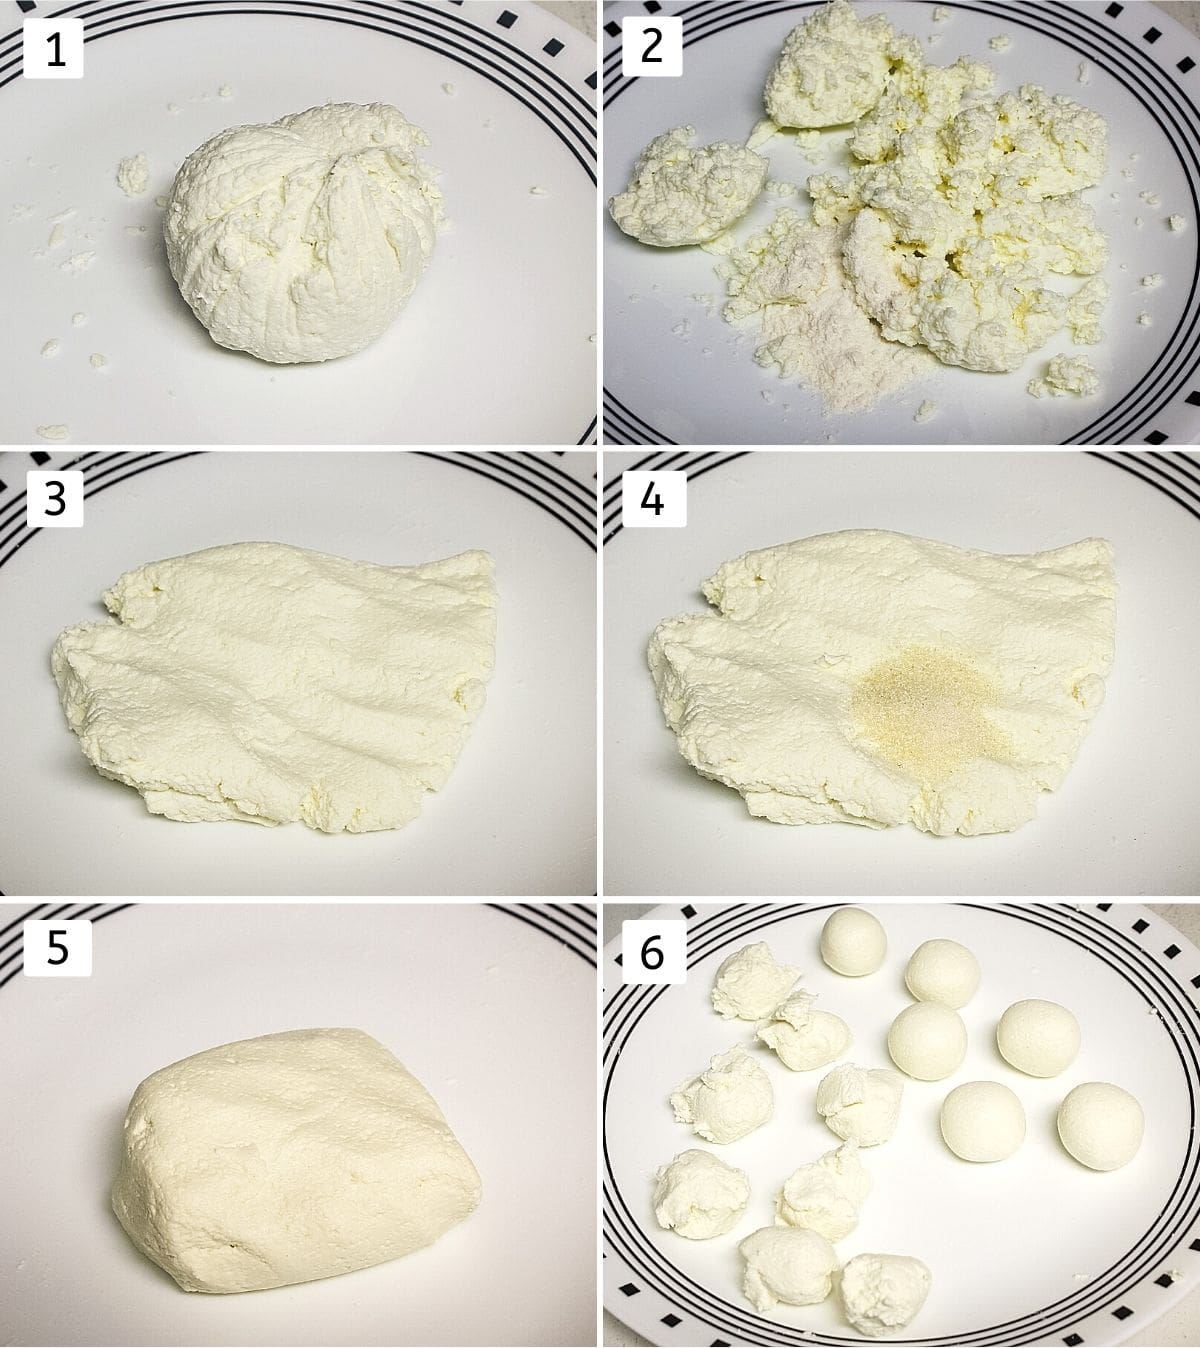
- Gather the cloth edges and light squeeze it till it is no more dripping. No need to hang or put the weight on it. Just squeezing will do the job. Check the chenna, It should be moist (not wet). Kneading & Shaping Rasgulla Balls:
- Take cheena ball to the plate or board.
- Now break and just notice the large granules of milk solids.
- Now add all purpose flour and rose water. Now start kneading the cheena, while kneading use the pressure from your palm. Knead till it comes together like a dough.
- Now add sugar.
- Again start kneading till you get a smooth dough ball. Also, stop kneading as soon as your hand starts to get greasy. Now if you look inside the dough, you won’t see any granules of milk solids like you noticed earlier (at step 2).
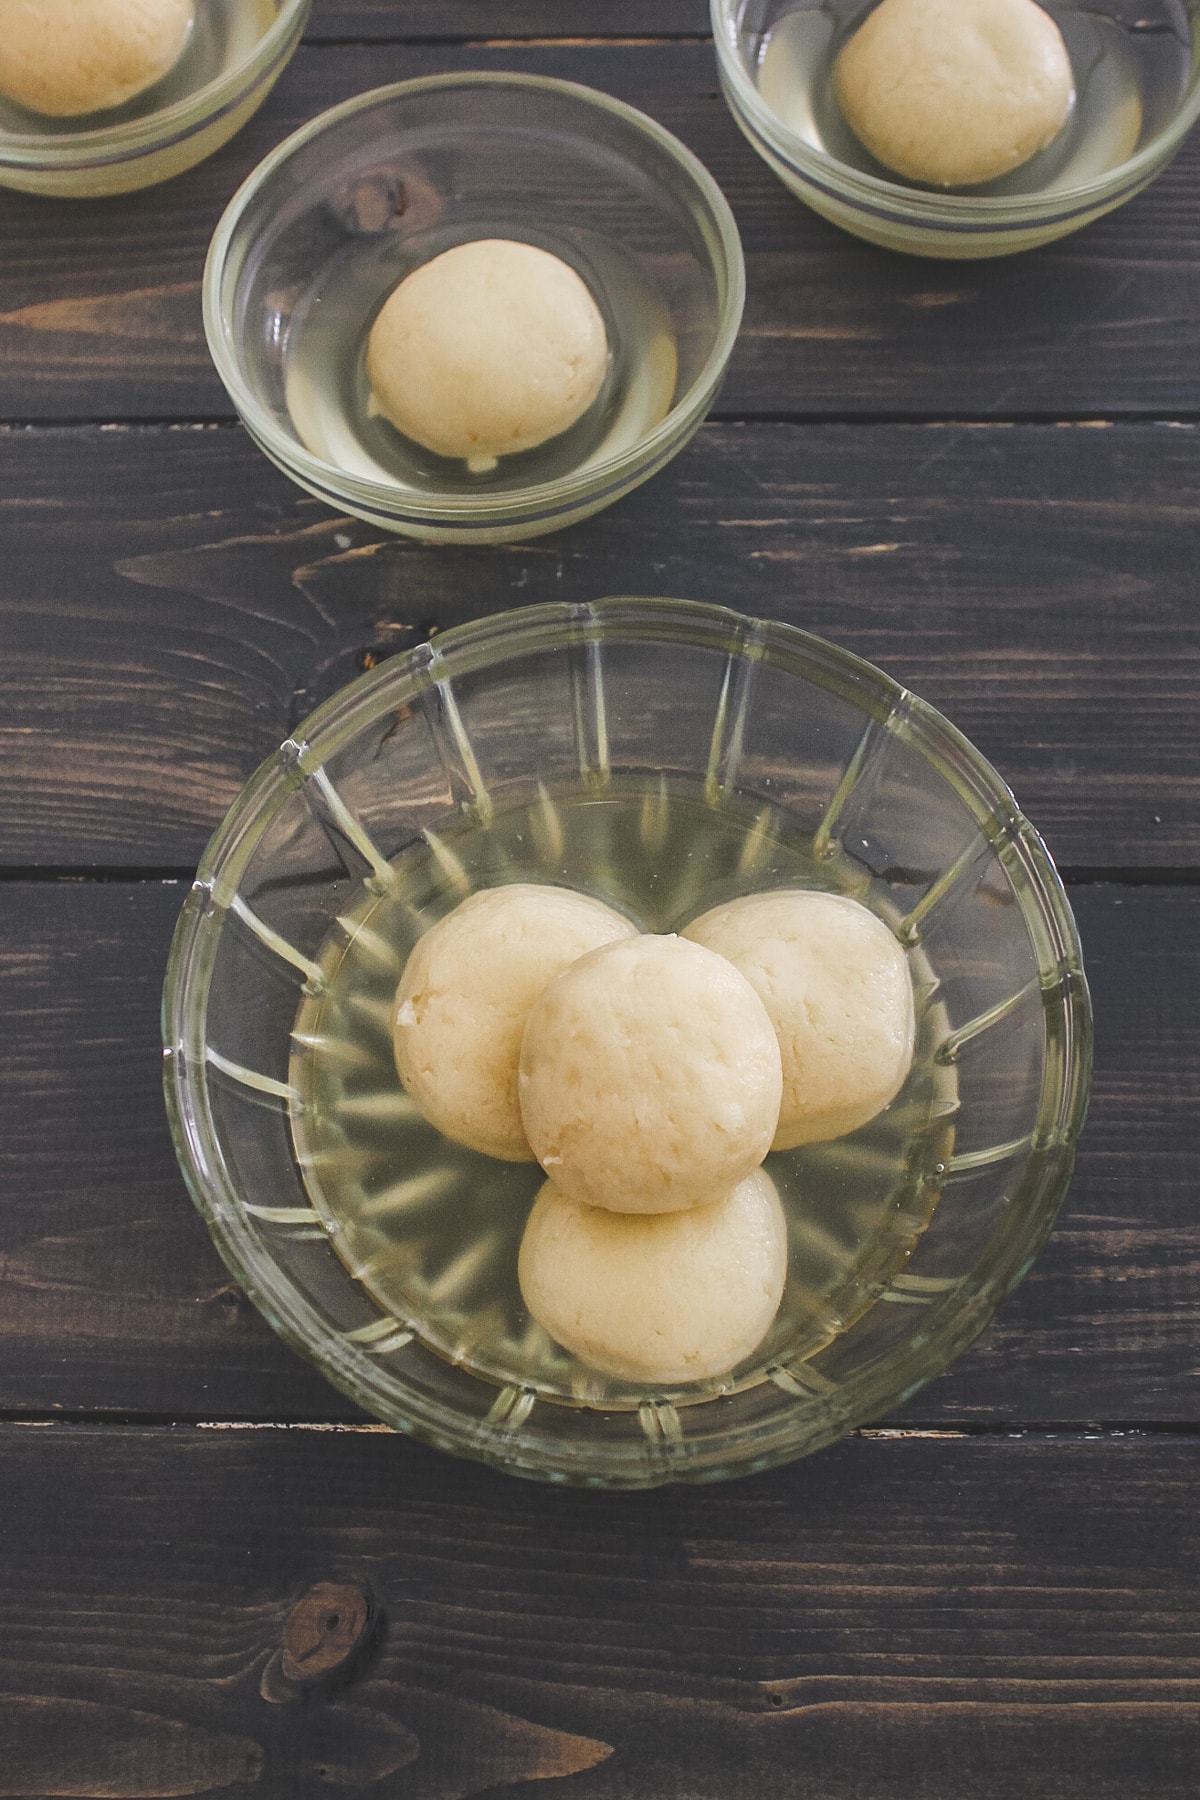
- Now divide it into 14 equal portions. Make smooth, crack-free balls and keep them covered with a clean kitchen towel to avoid drying. Cooking Rasgulla:
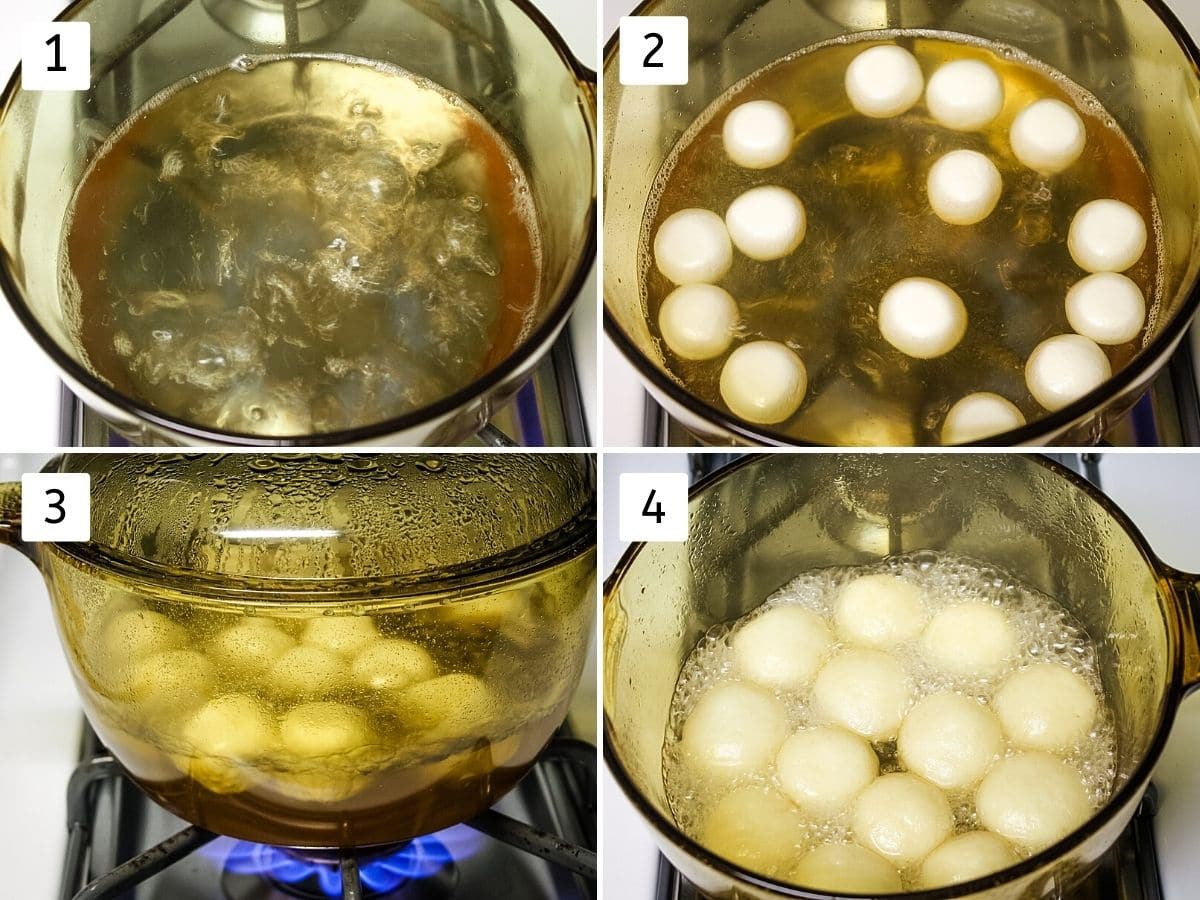
- Take sugar and water in a pan and bring it to a rolling boil on medium. The shape and size of the pan play an important role here. Make sure that rasgulla has enough space to expand and move around. Plus, it should be deep enough that it stays submerged into the syrup. So shallow and too wide pan doesn’t work here. I am using an 8-inch diameter deep saucepan.
- Add balls into rolling boil sugar syrup.
- Cover it with the lid and continue cooking for 20 minutes without disturbing and opening the lid. All the time the sugar syrup has to be boiling (not simmering). So keep the heat medium. (not high that it is boiling too rapidly)
- Now you can see that rasgulla have increased more than double the size. Turn off the stove.
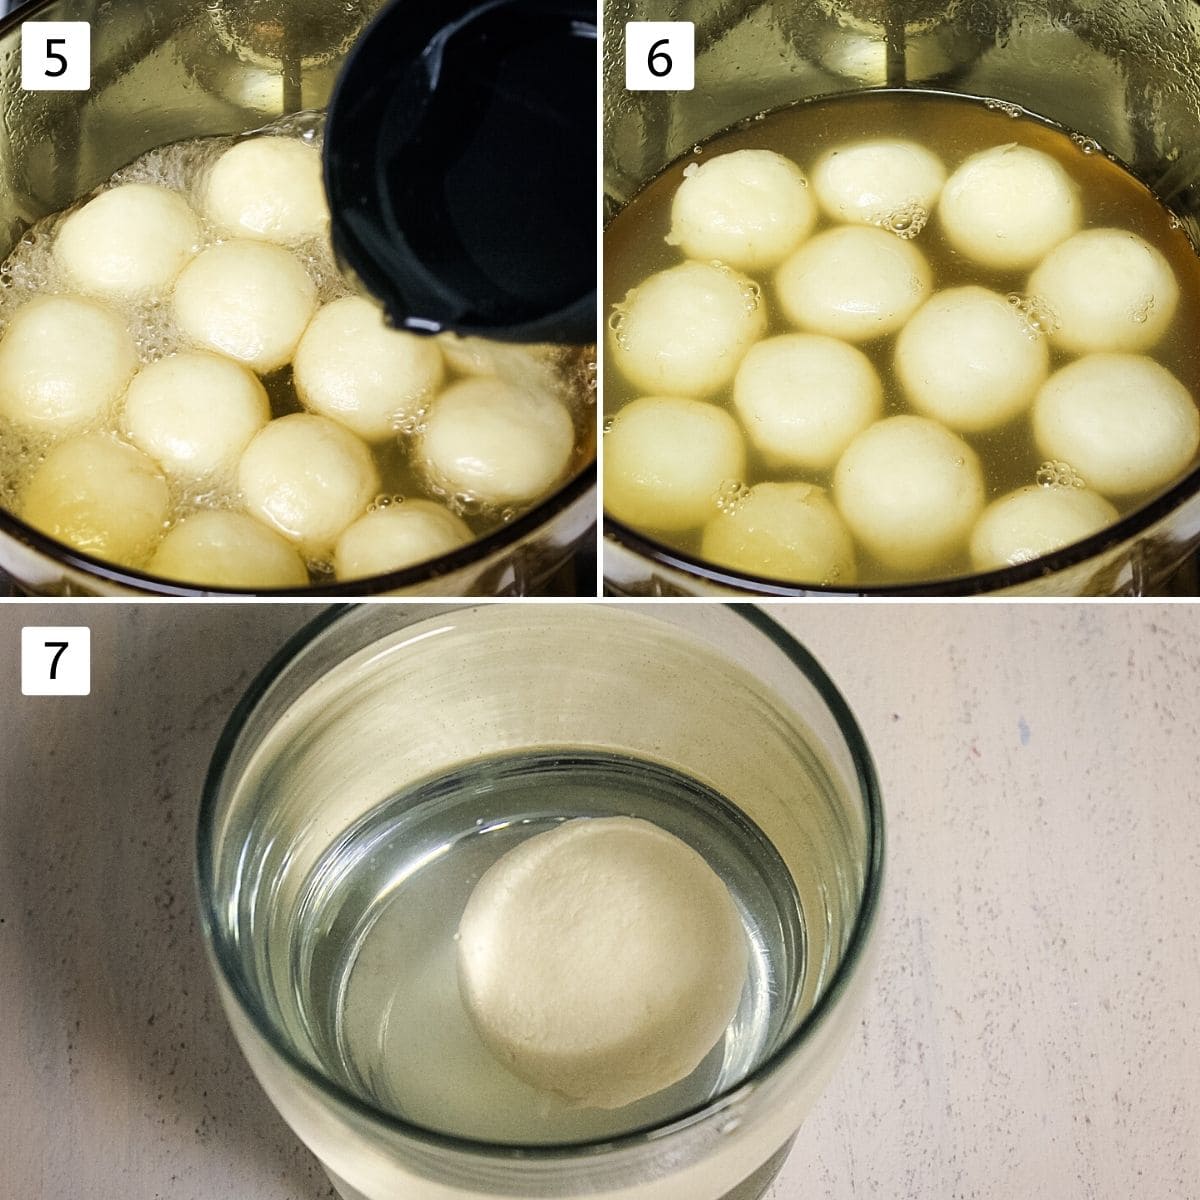
- After turning off the stove, the syrup is still bubbling (because syrup gets high temperature), so to cool it down and stop further cooking, add 1 cup of room temperature water.
- Syrup stops bubbling and rasgulla sink to the bottom. That is perfectly normal.
- How to check rasgulla is ready? Take one rasgulla using a spoon and drop it into the glass of water. If it sinks and goes to the bottom then it is cooked. If it floats on top, means it is still raw from inside. It needs more cooking.
💭 Expert Tips For BEST Rasgulla Recipe
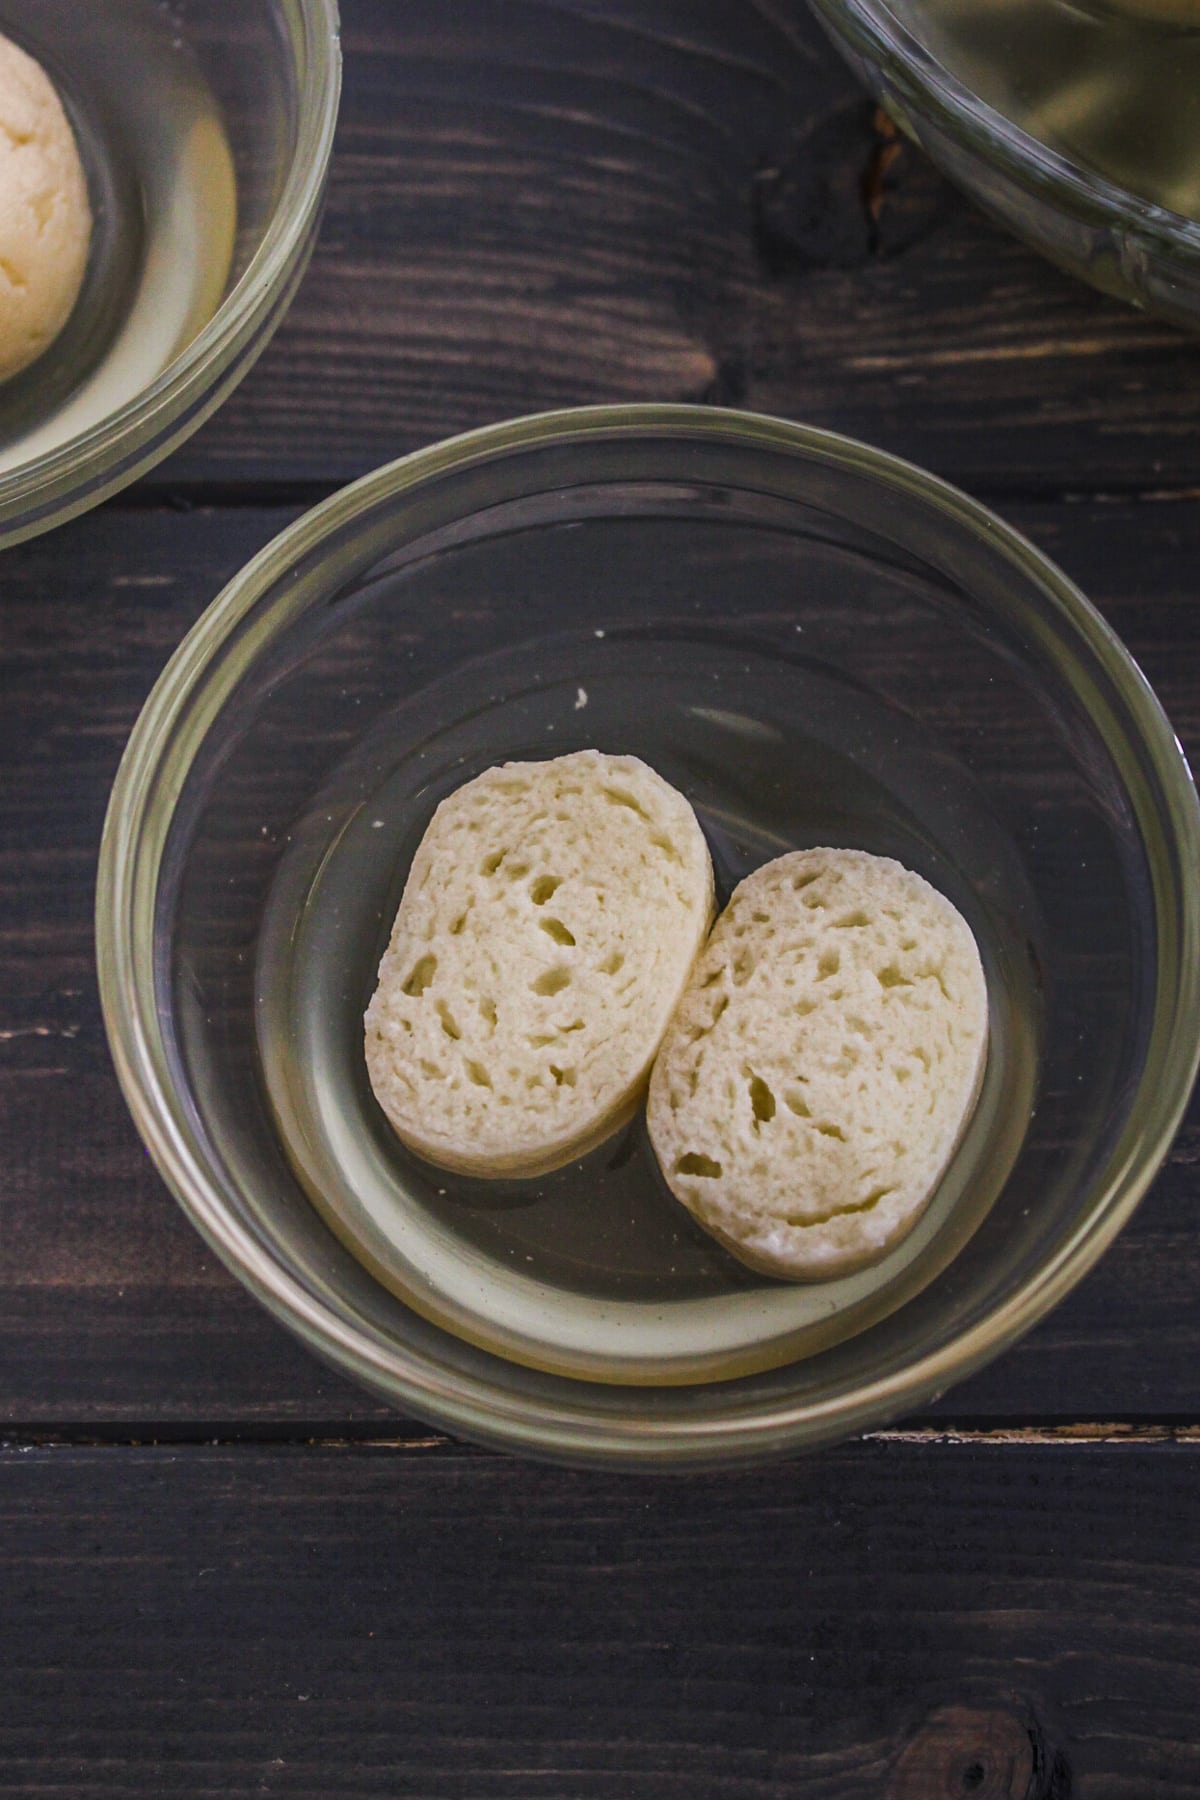
The size & shape of the pan does matter. As I have mentioned, for this quantity, use 8-9 inch diameter pan. Pan should be deep like a saucepan, not the shallow pan. You can see in the step by step pics. So basic fundamental is rasgullas should be submerged in the syrup while cooking and they should have enough room to expand while cooking. Never ever think of using store-bought fresh or frozen paneer to make rasgulla. Make it at home. Paneer and chenna are two different. Chenna should have the right moisture in it. – If it has too much moisture then it may disintegrate in the syrup while cooking. Sometimes, it doubles in size but shrinks after cooking.– If it is dry then rasgulla become rubbery, chewy and dense. Sometimes they flatten like a disc after cooking. The kneading process is very important. – Knead till smooth and no more milk granules. – Also, while kneading when you palm gets slightly greasy. Stop right there.– Over kneading makes them shrink after cooking.– Kneading time purely depends on the quantity you’re making, plus how much pressure you’re using while kneading, how speedy you are. So cannot give you the exact time, but follow the above-mentioned signs to determine chenna is kneaded well or not. Do not reduce sugar and water quantity. It looks too much sugar. But we are not consuming all the syrup. To get the best texture, the syrup should be boiling consistently all the time. So for that, the gas heat should be on medium. (not high). Storage: Store rasgulla (along with sugar syrup) in the refrigerator in an airtight container for up to a week. Can you see how spongy it is? Check Out Other Indian Sweets
Rasmalai Sandesh Kalakand Gulan jamun Sheera Kaju katli
PS Tried this rasgulla recipe? Please leave a star rating in the recipe card below and/or a review in the comment section. I always appreciate your feedback! Plus, Subscribe to my newsletter and follow along on Pinterest, Instagram, and Facebook for all the latest updates.
